Where to Put Google Adsense Code in Wordpress
Setting up your website is the first step to taking your business online. To set up your website so that it looks professional, it is important to choose a custom domain name and web hosting . Once your website is up and running, you can monetize it by running ads on it. One of the most popular ways to monetize your website is using Google AdSense.
Google AdSense is a platform by Google that lets you run simple, free and flexible ads on your website. The platform enables you to easily earn money from your website by placing engaging ads.
In this tutorial, we will walk you through how to add Google AdSense code to your WordPress website. Let's get going!
There are two ways of adding Google AdSense to your website viz. manually and automatically. We will cover both these methods.
Adding Google AdSense Ads Manually
Step 1: Go to Google AdSense website
The first step to setting up a Google AdSense campaign is to set up your Google AdSense account.
- Go to the Google AdSense website
- Click on 'Get started'
- Enter your website URL and either your business email address or your @gmail.com/yahoo.com/outlook.com to start the sign up process
- Next, re-enter your website URL, select your country, and click on the 'I accept' after reading the terms and conditions
- Next, click on the 'Create Account' button to complete the signup process
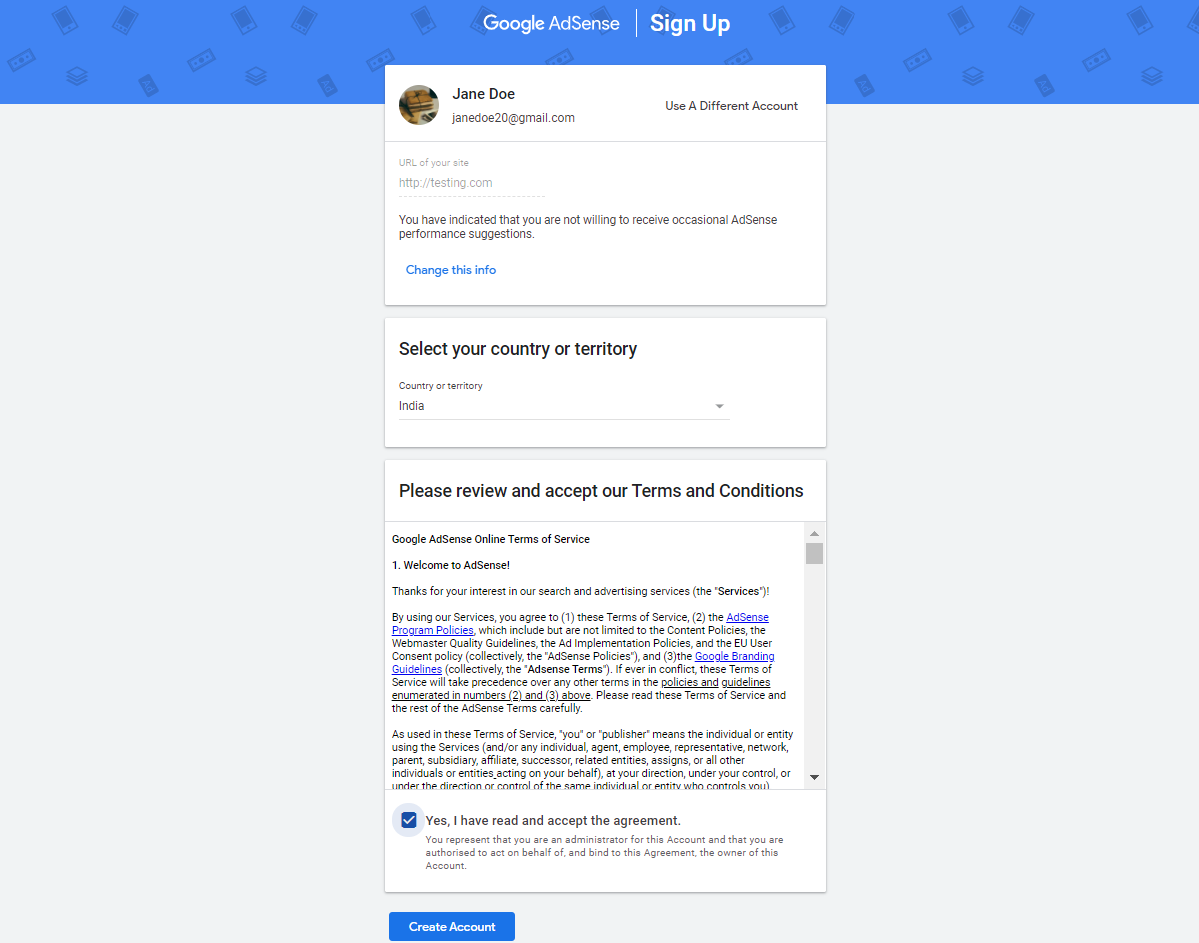
Step 2: Setting up your Ad to be posted on your website
After clicking on the 'Create Account' button, your AdSense account will be created and you'll be redirected to the Google AdSense dashboard. Here you can manage your AdSense account as per your requirements.
Let us start by creating your first ad.
- Click on the 'Ads' menu on the left-hand sidebar
- Now, an overview window with three tabs will appear viz. 'By site', 'By ad unit' and 'Global settings'
- Switch to the 'By ad unit' tab and click on 'Display ads' viz. the recommended way of creating a new ad unit
Note: If you are well versed with ads, then you can select any of the ads mentioned. However, for a beginner, Display ads are a good starting point.
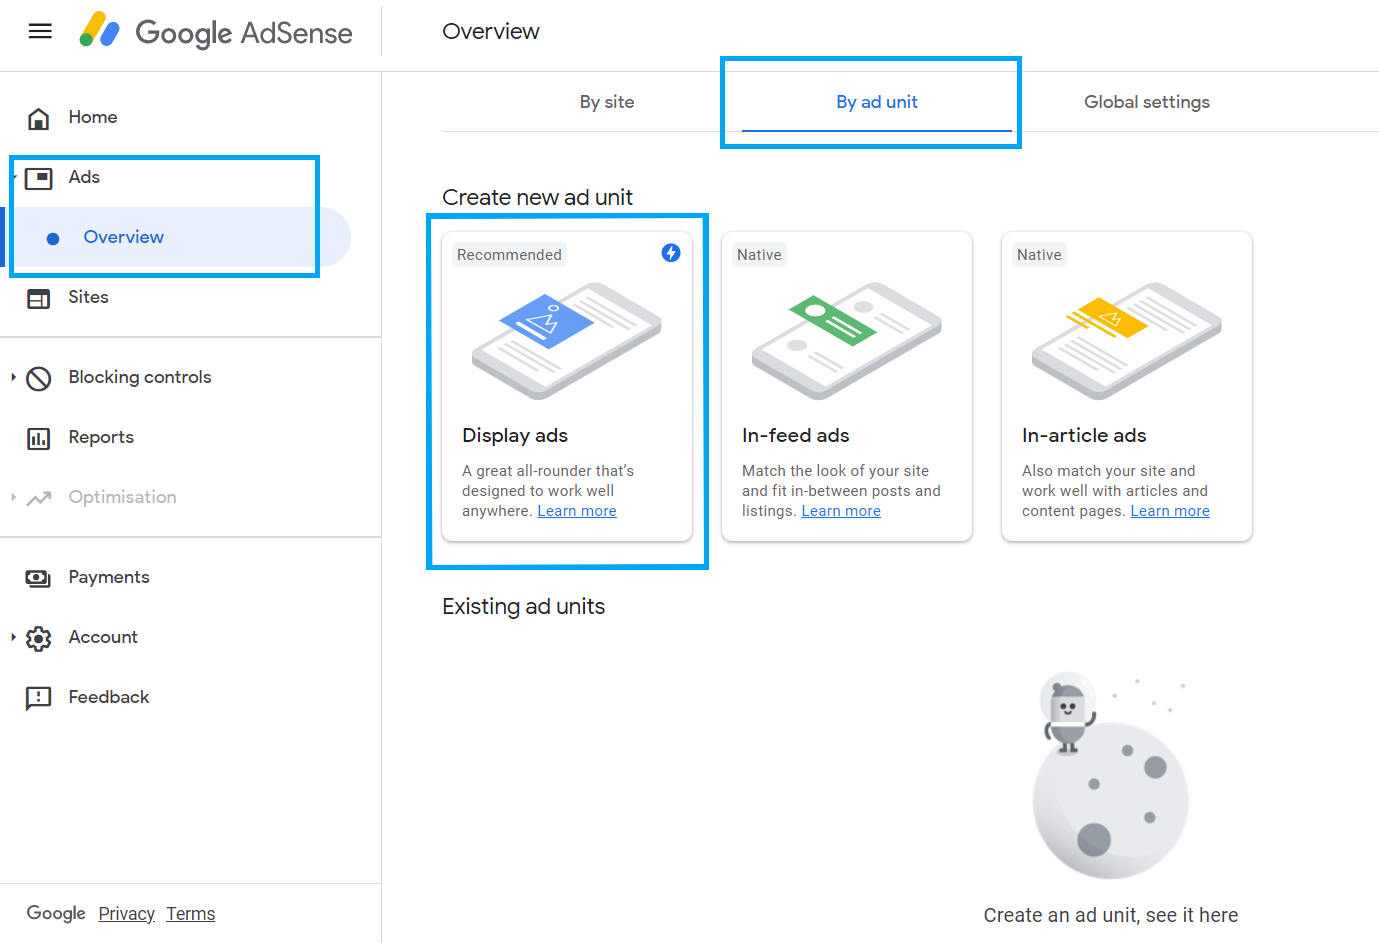
The next step is to name your ad and specify the size. Once you double click the 'Display ads' image the following pop-up window will appear.
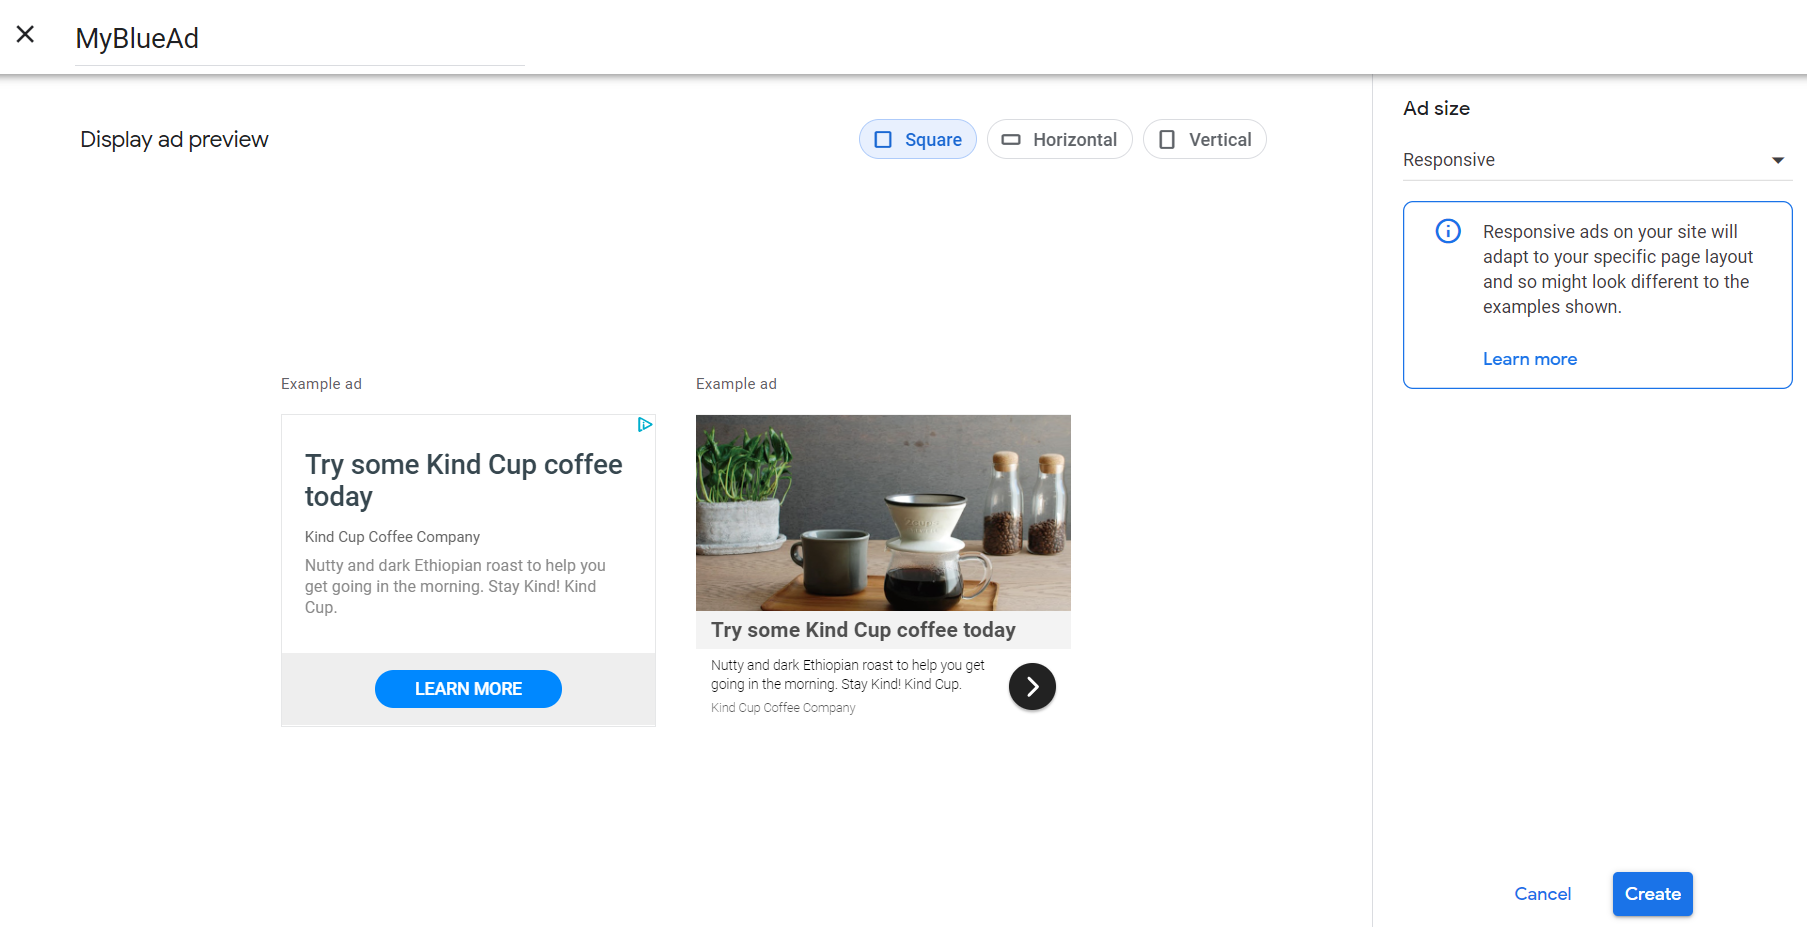
- Name your ad in the text box that displays 'Name your ad unit'. Here, 'MyBlueAd' is the name of our ad. You can also preview the ad if you wish
- Next, you need to specify the size of your ad. There are two parameters you can choose from 'Responsive' and 'Fixed'. It is recommended to go with a responsive ad as it automatically adjusts itself depending on the web page layout. However, if you wish you can specify a fixed size too
- After you're done with these two steps, click on the 'Create' button
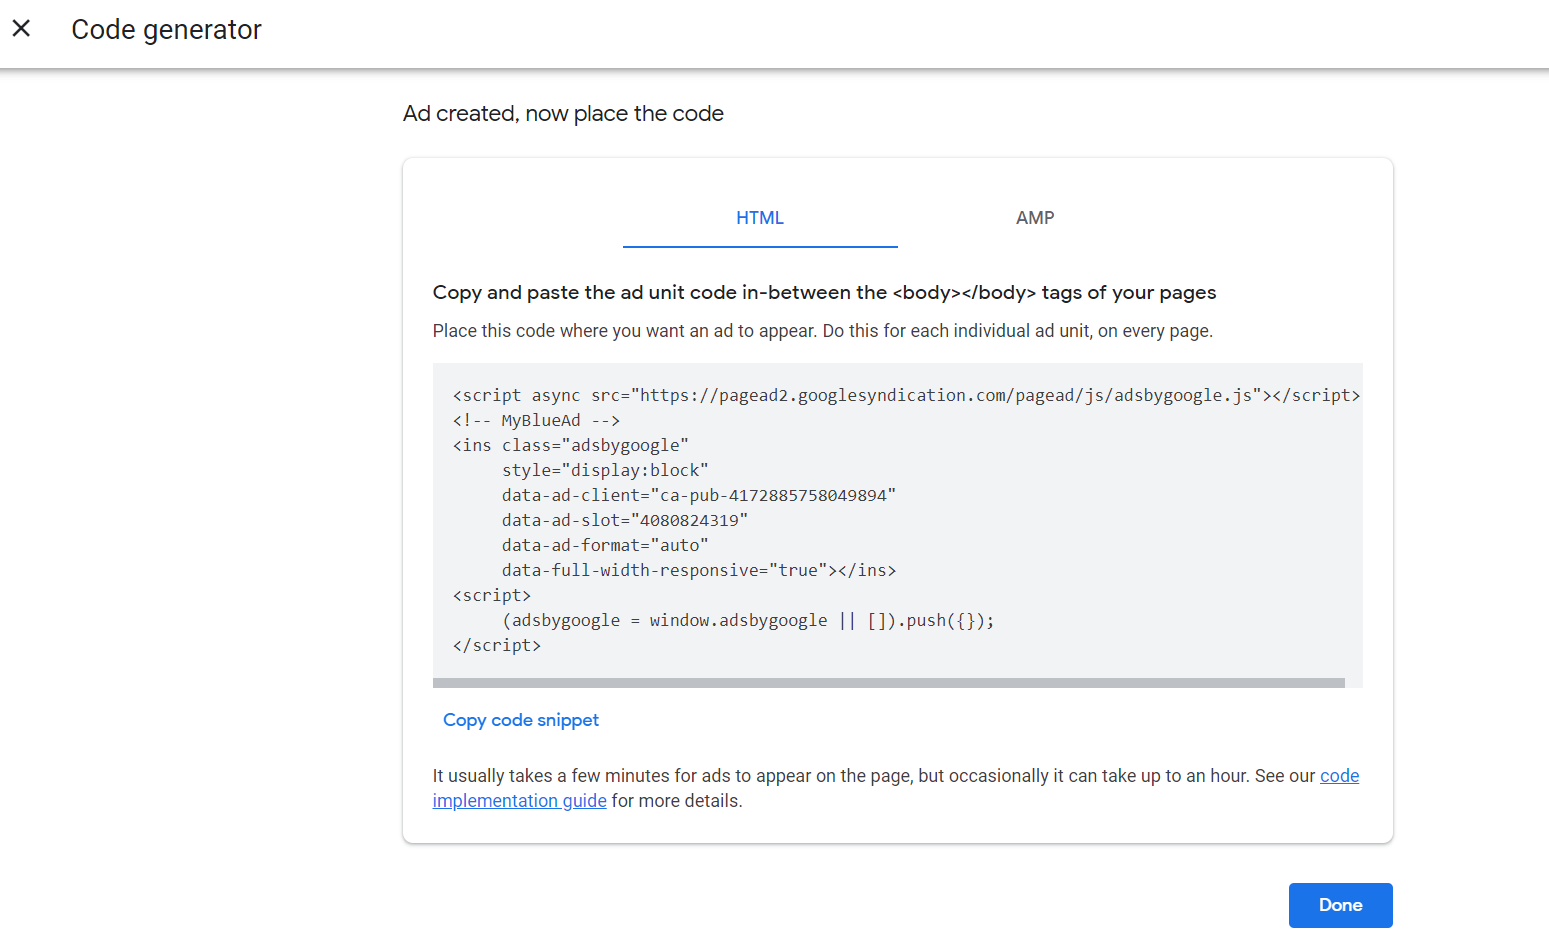
Post clicking the create button, Google AdSense creates a unique 'ad code' in two formats viz. HTML and AMP. This code contains your unique ad unit ID and publisher ID.
Copy and paste the code in your Notepad, as it will be required for step 3.
Step 3: Adding Google AdSense to your WordPress
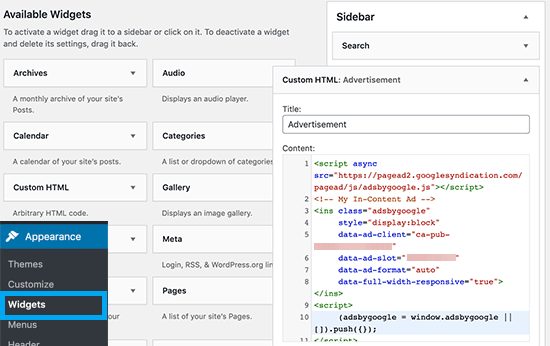
Once you are done generating the code for your ad, it is time to add it to your WordPress site. For adding a custom code to your WordPress backend, you need to insert it through a widget.
Follow these instructions:
- Log in to your WordPress dashboard
- Go to the 'Appearance' tab on the left-hand side sidebar
- Click on 'Widgets' from the list and a new page will open
- Here select the 'Custom HTML' widget. Drag and drop this widget where you want to place your ad in the proper widget area
- Paste the Google AdSense code of your ad there
Adding Google AdSense Ads Automatically
If you're a beginner and do not know much about ads, Google has this simplified for you. Instead of manually creating an ad from scratch, you can directly copy an ad code that Google provides to your site.
Although there is one disadvantage to this method, unlike manual ads you can't control where your ads are placed on your website. However, apart from the placement, your ad works perfectly fine. Let us see how you can auto-add ads to your WordPress account.
- Click on the 'Ads' menu on the left-hand sidebar
- Now, an overview window with three tabs will appear viz. 'By site', 'By ad unit' and 'Global settings'
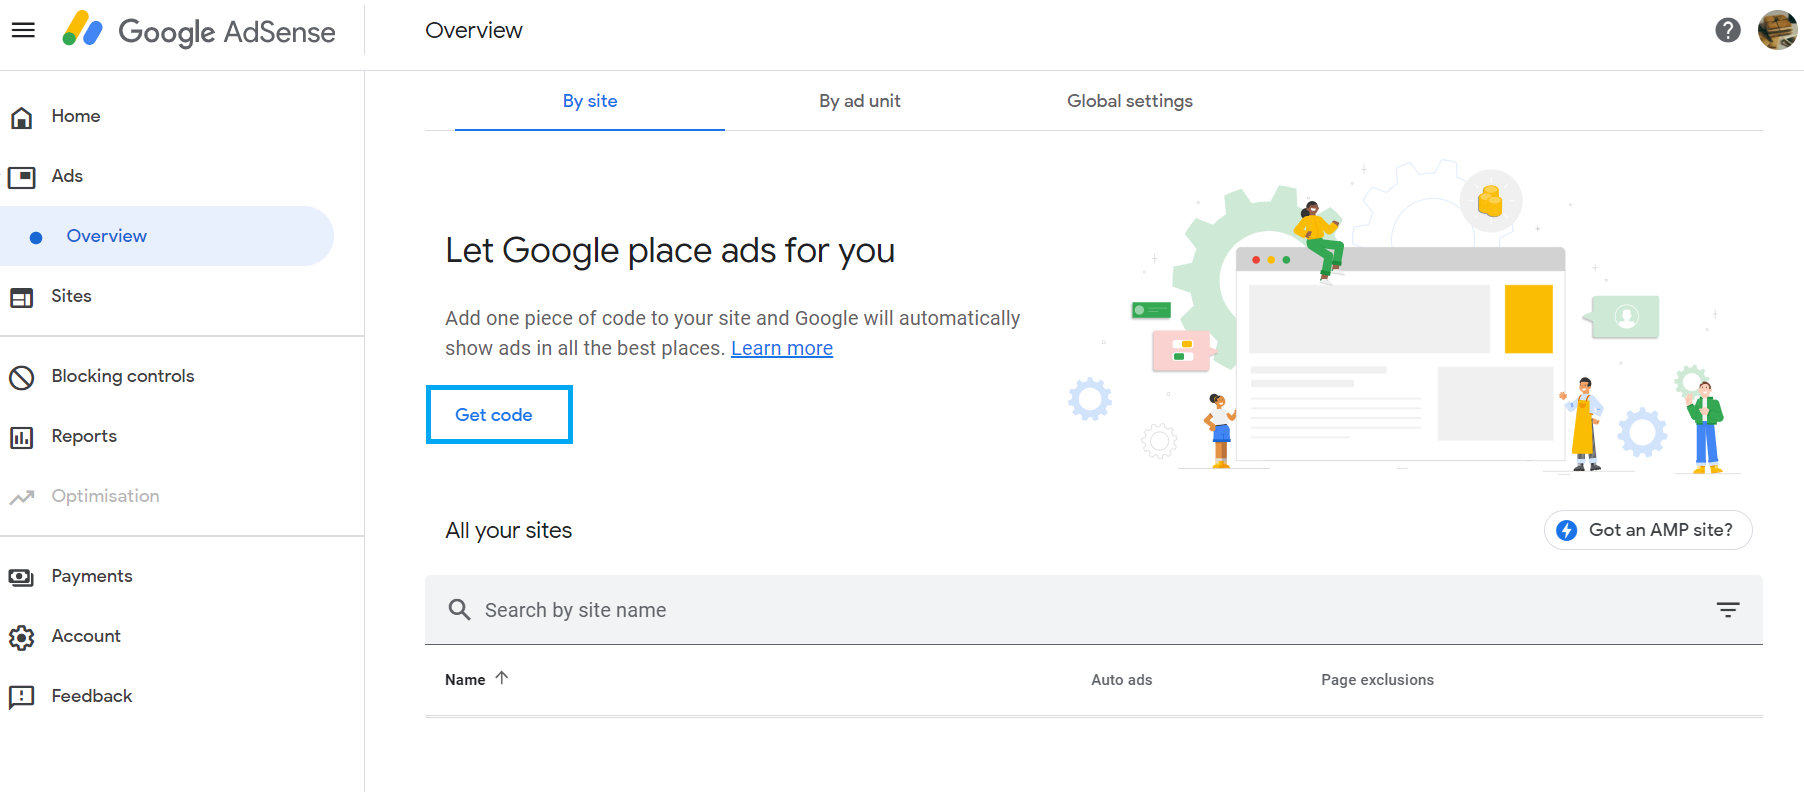
- Go to the 'By site' tab and click on 'Get Code'
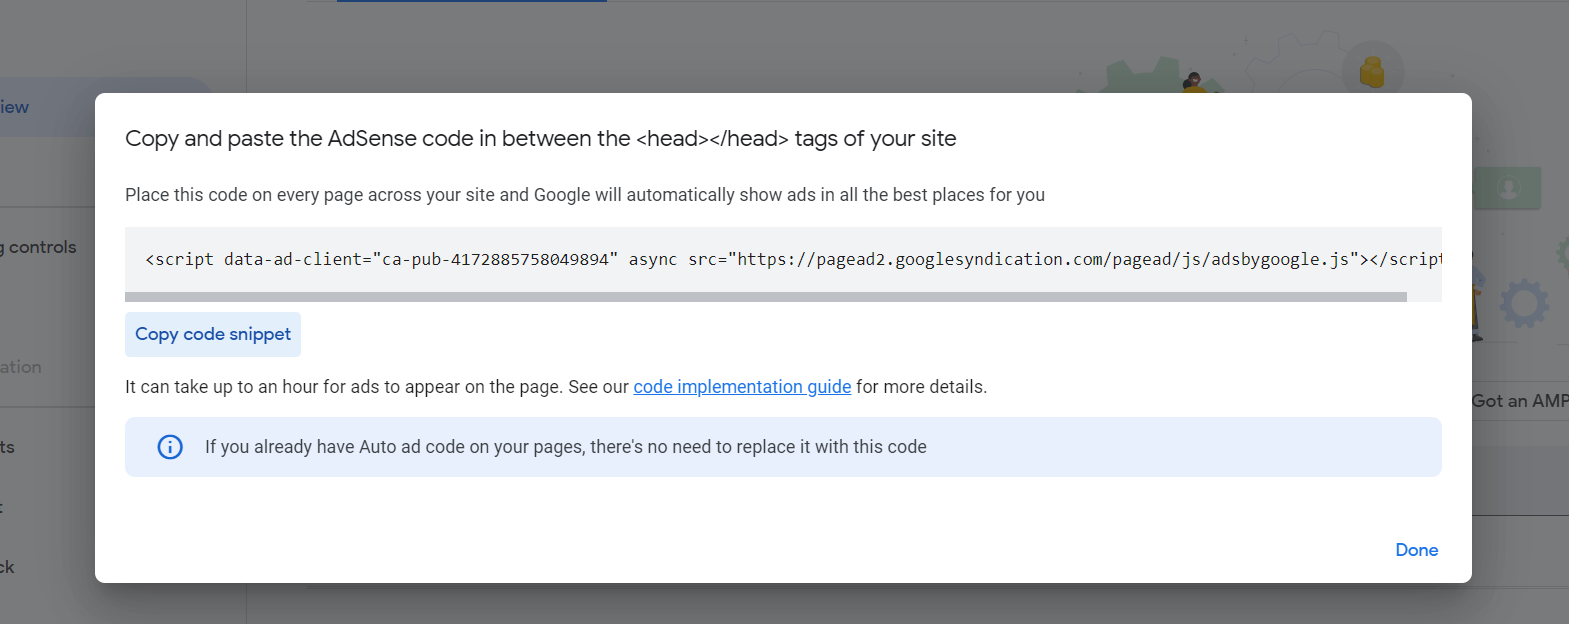
- After clicking on 'Get Code' a pop-up window will open with AdSense code. Copy this code for future reference on your Notepad.
- Log in to your WordPress dashboard
- Go to the header.php file (this file is found in your website's theme) and paste the copied code here
However, it is best not to make changes to your header.php file if you aren't well-versed in coding as an error with this file can disrupt your website. A simpler way is to paste the code using a plugin. Some of the suggested plugins are Insert Headers and Footers , Woody code snippets , and more.
After inserting the code in the plugin, click 'Save' so that the ad can appear on all pages of your WordPress website.
Advertise to Monetize
Google AdSense is a great way of earning money by displaying ads on your website. We hope this article helped you understand the Google AdSense platform and how to use it to add ads to your WordPress site.
So, what are you waiting for? Go, get started on adding a Google AdSense code to your website to advertise ads and monetize it to make a profit!
For more information, head to the WordPress Tutorials page and browse through a large repository of helpful resources and blogs.
Where to Put Google Adsense Code in Wordpress
Source: https://www.bluehost.in/tutorials/how-to-add-google-adsense-to-wordpress
0 Response to "Where to Put Google Adsense Code in Wordpress"
Post a Comment